How to use Burp Suite Like a PRO? PART – 1
This blog series is an advanced tutorial of the popular web application security and penetration testing tool Burp Suite, to help security researchers and bug bounty hunters discover new and exciting ways to use Burp Suite.
#1 Perform Scans only to specific endpoints
Most of us use the scanner function of the Burp Suite to find security
flaws. However, it is also important that you make as little noise as possible
while scanning.
Burp Suite allows users to scan specific endpoint(s).
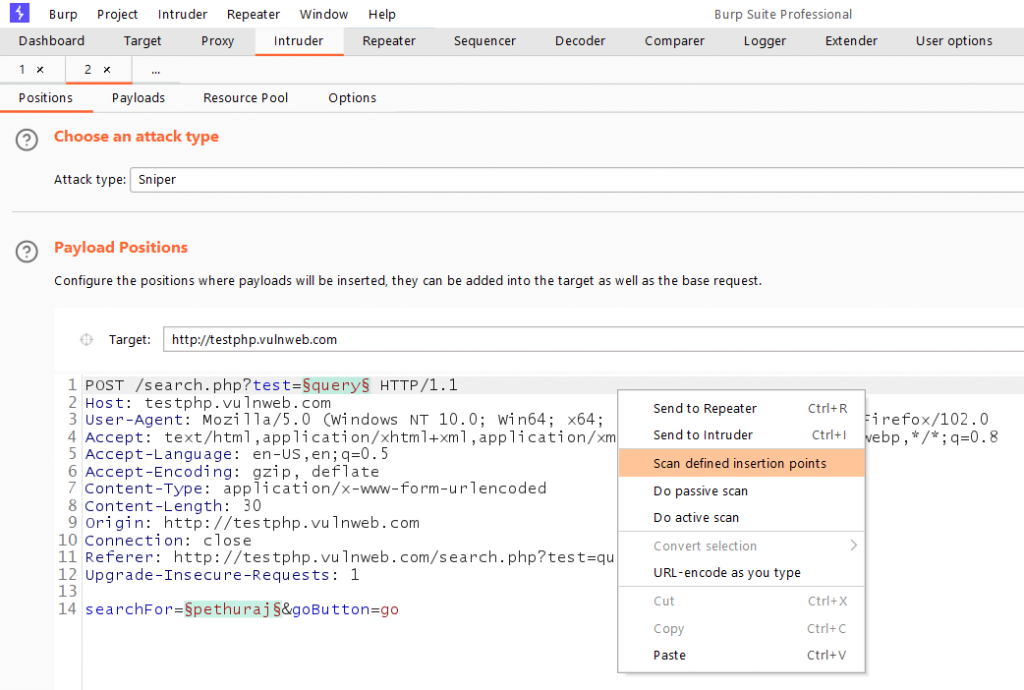
To do so, Capture the request and send it to the Intruder tab.
Manually select the endpoints to be scanned, then right-click and choose Scan
defined insertion points to configure the scan type.
This allows you to scan the specific endpoint while increasing productivity.
#2 Difference between Copy URLs in this Host and Copy links in this Host
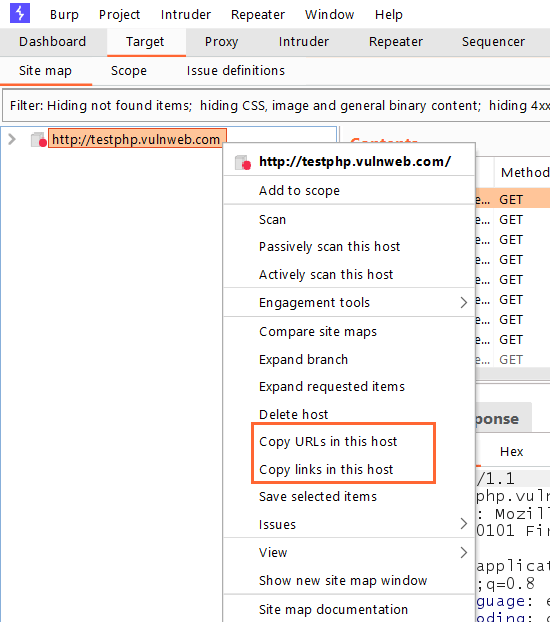
This feature allows users to copy the URLs and links from the Host.
But, what is the difference between copying URLs and links?
Well, it’s simple.
Copy URLs in this Host copy all the links found in the target, including links referencing third-party sites that are not in scope.
Copy links in these URLs copy only the in-scope URLs.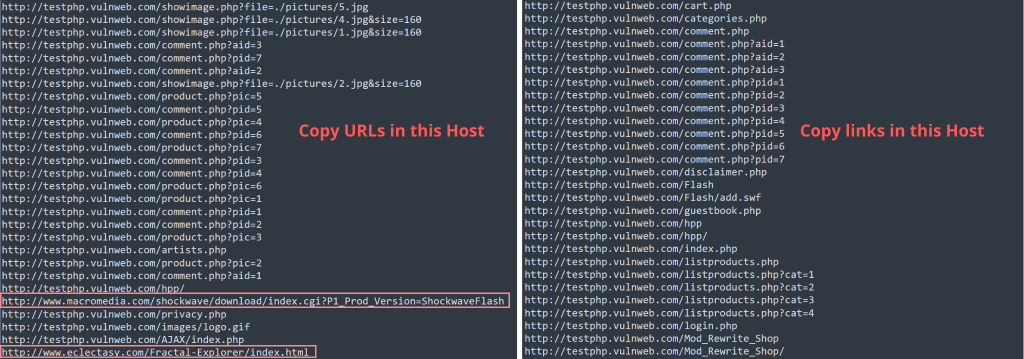
#3 Perform Directory fuzzing in Burp suite
Did you know that Burp Suite can also be used to perform directory fuzzing?
Select the target domain from the Target tab and right-click to access Engagement Tools > Discover Content. (Only available in the Burp Pro version)
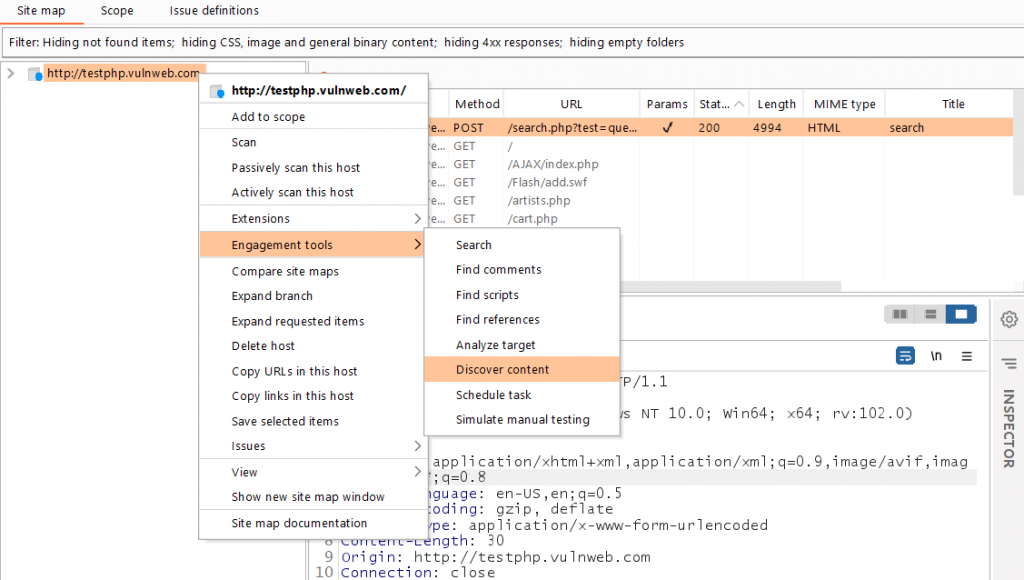
You’ll now see a new popup with the directory fuzzing configuration. You can use your preferred wordlists.
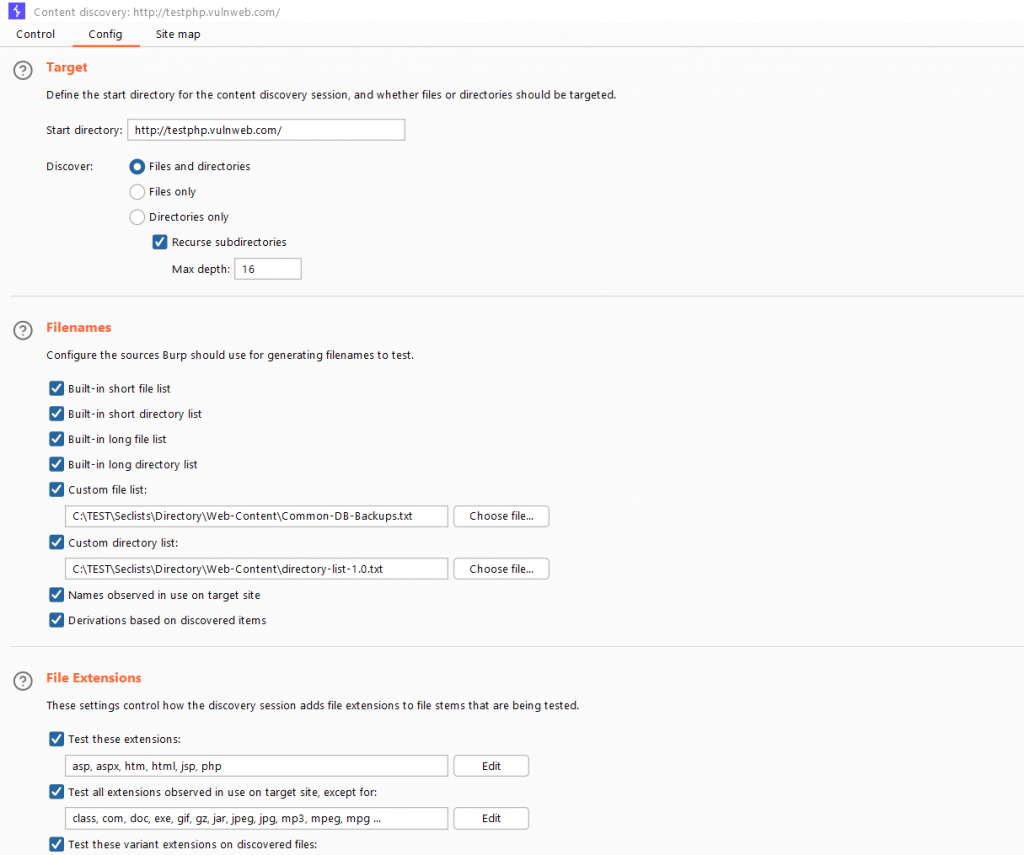
You can also configure it to look for specific file extensions.
#4 Automatically Backup Burp projects
Burp Suite allows users to save their projects for later use. The issue arises when the burp crashes unexpectedly, resulting in the loss of data.
To address this, Burp provides the option to save projects at predefined intervals.
Go to User Options > Misc and look for the option Automatic Project Backup.

Users can set the Burp to save their projects at specific intervals and specify which targets to include in the backup.
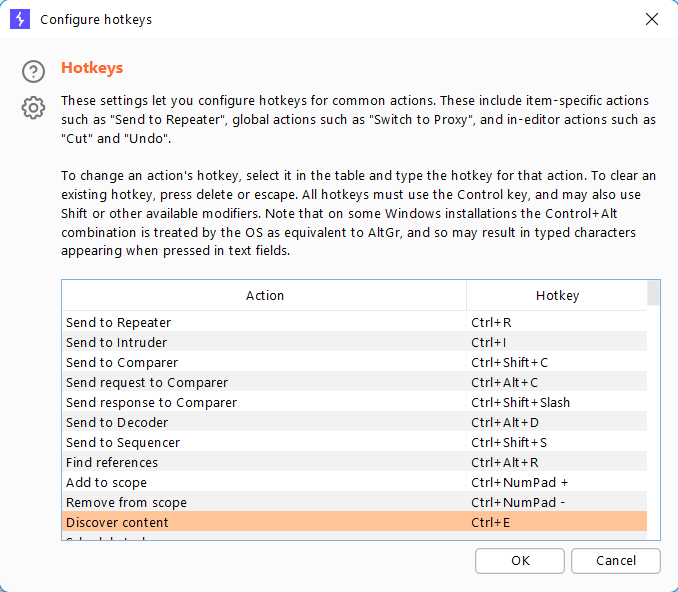
#5 Set Custom Burp Suite Keyboard Shortcuts (Hotkeys)
Burp Suite offers a set of keyboard shortcuts that can be used to make it easier while testing.
Navigate to User Options > Misc and select Hotkeys.

Users can assign their favorite keys as keyboard shortcuts.
#6 Schedule Burp Suite Tasks
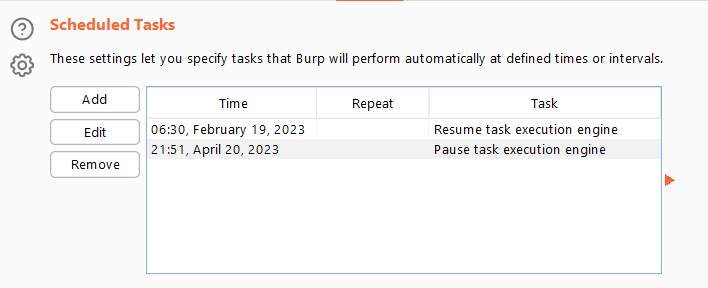
Burp Suite provides users to schedule the task.
You can use the task scheduler to start and stop specific tasks at predefined intervals. You can use the task scheduler to start and stop certain automated tasks while you are not working on a regular or recurring basis.
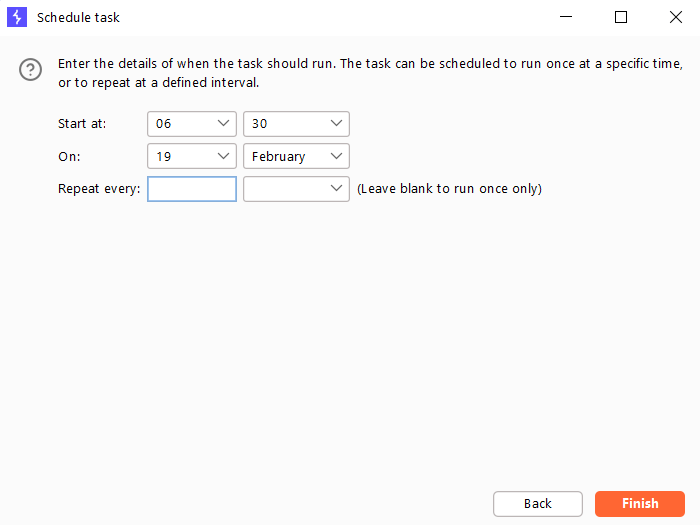
Go to Project Options > Misc and look for the Scheduled Tasks option.
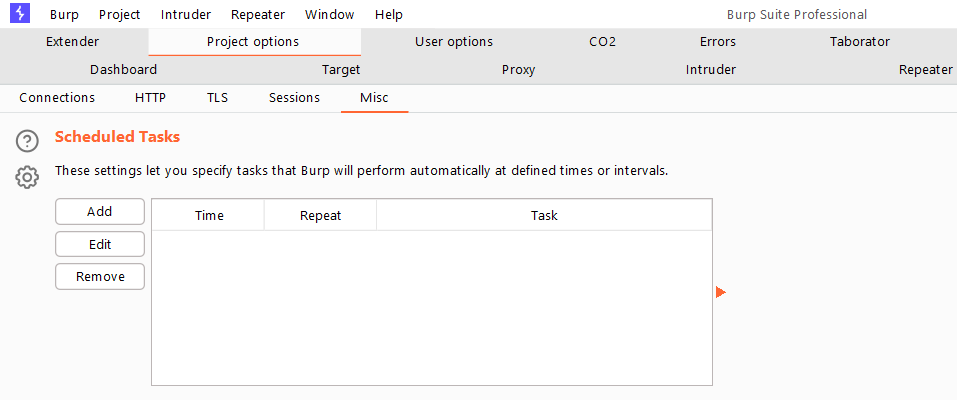
On the next screen, click Add and you’ll be given two options.
To either pause or resume a task.
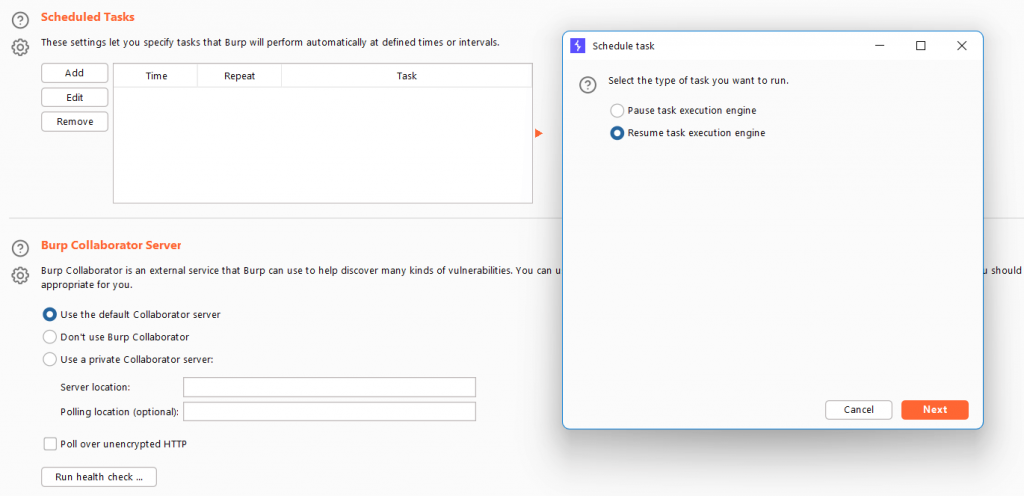
Enter the time that the task should run. The task can be scheduled to run once at a specific time or at regular intervals.
#7 Issue Definitions
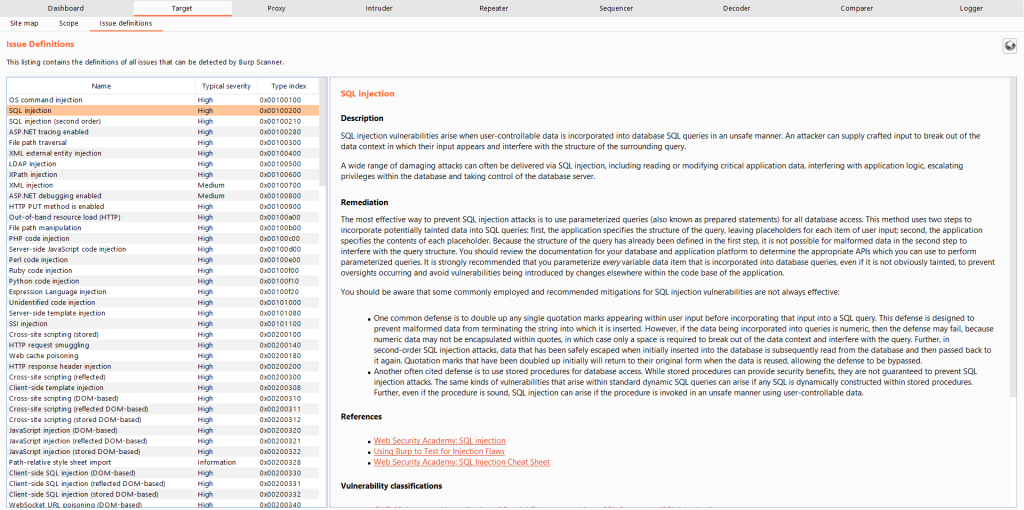
Most of us browse the web for the vulnerability description, impact, and references for reporting the vulnerabilities.
Do you know Burp Suite has this by default, and this can be found under Target > Issue Definitions.
#8 Burp Configuration Library (Create custom scan configurations)
Burp Suite has a wide range of scan configurations, such as critical issues only, extensions only, and so on.
However, we can customize our scan profile to our specific requirements.
Navigate to Burp > Configuration Library, and you’ll be presented with scan options on the next screen.
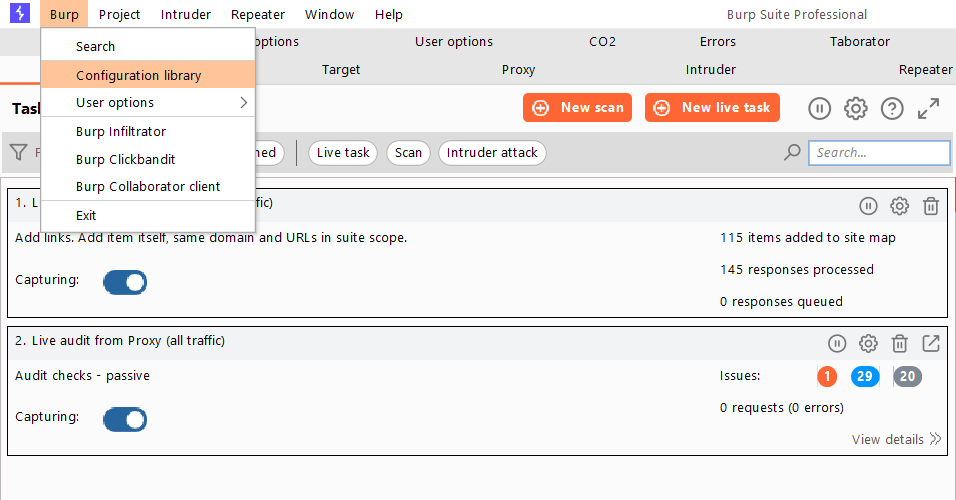
Click the New button to begin creating scan configurations.
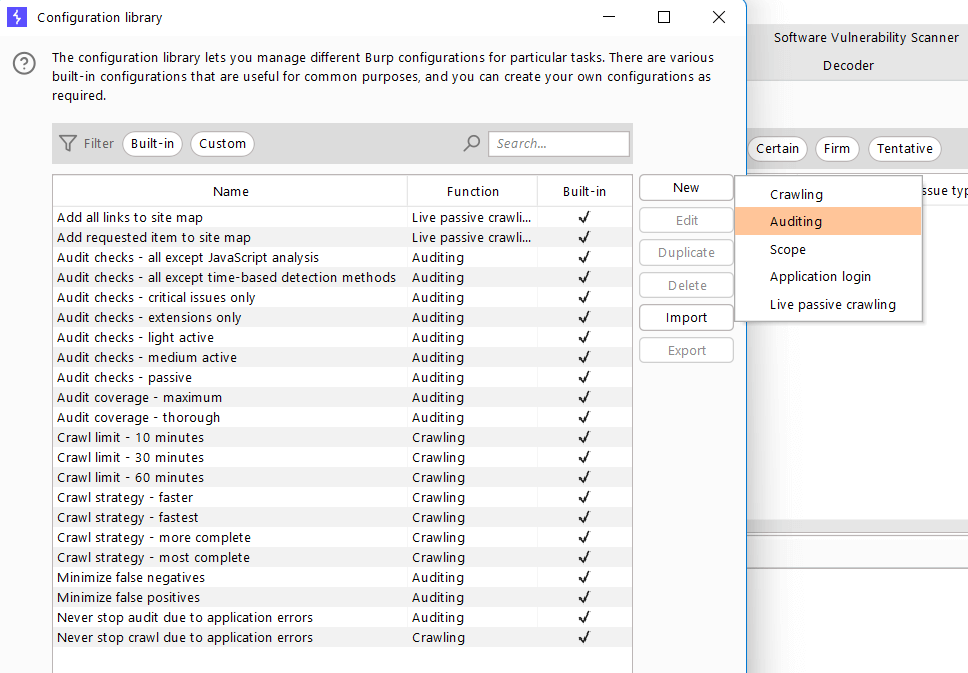
By default, Burp Suite has plenty of default scan configurations. Select the configuration you need and create a scan profile.
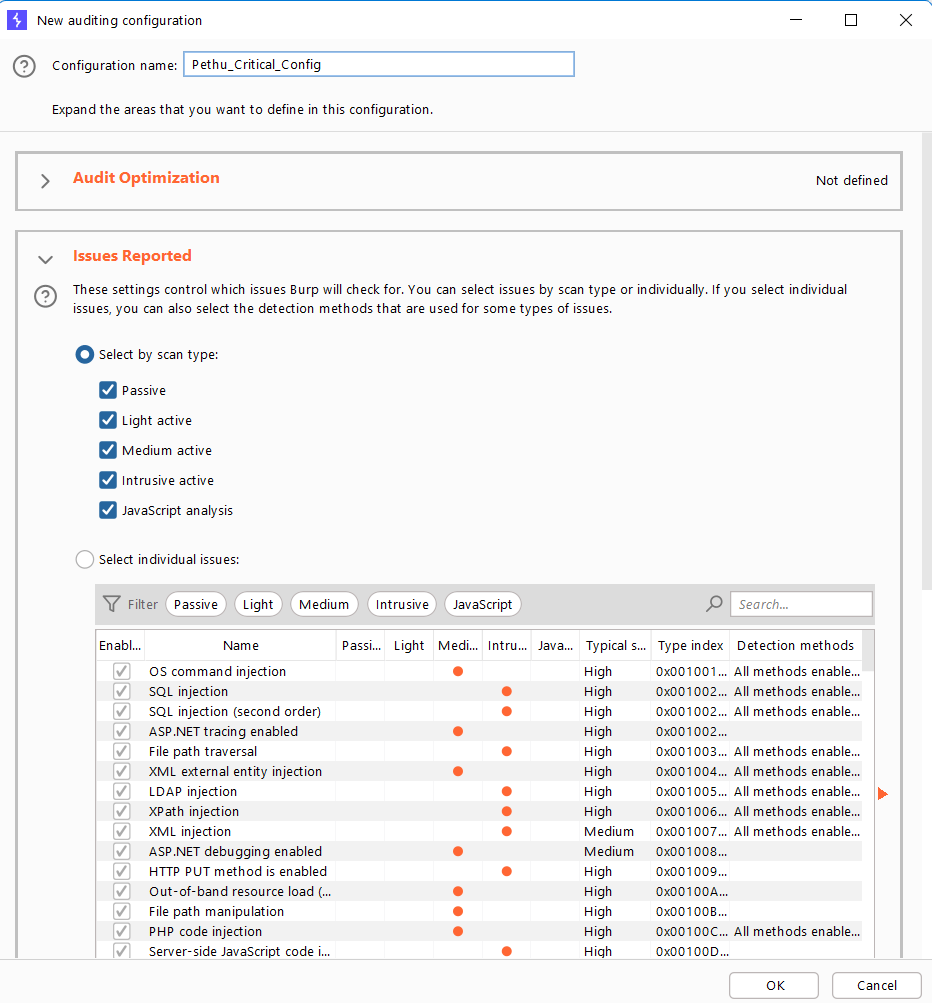
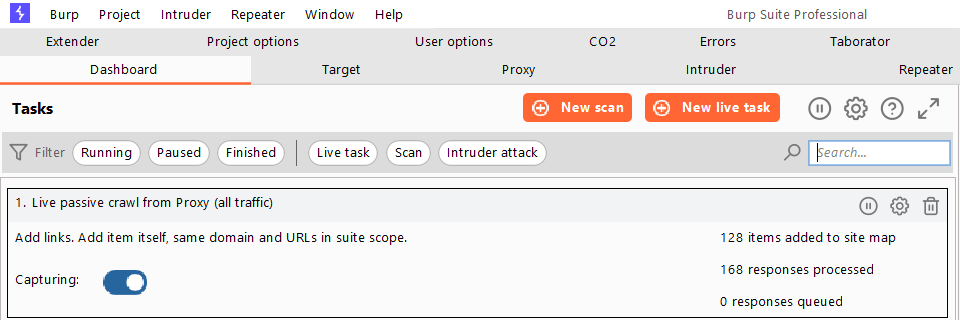
When the scan configuration is finished, give it a name and save it. Then, from the Dashboard, select New Scan to use the custom configuration.
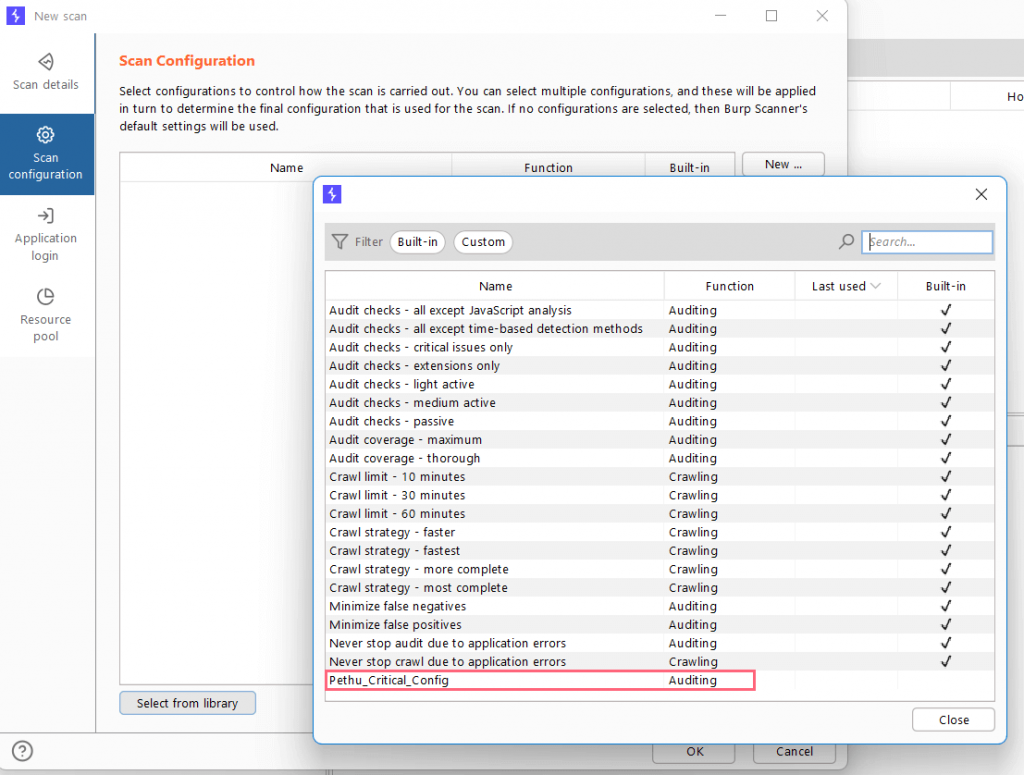
In the next popup screen, select the Select from library option, then locate and select the newly created scan configuration.
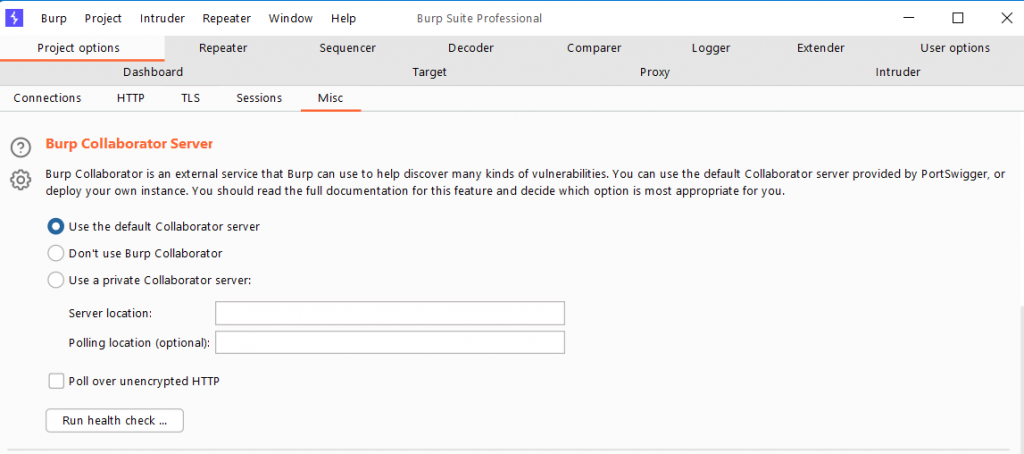
#9 Check if the default Collaborator server is working
Burp Collaborator is a network service used by Burp Suite to assist in the discovery of vulnerabilities via an external service.
But what if we just wanted to see if the Burp collaborator server was up and running or if the attack had failed?
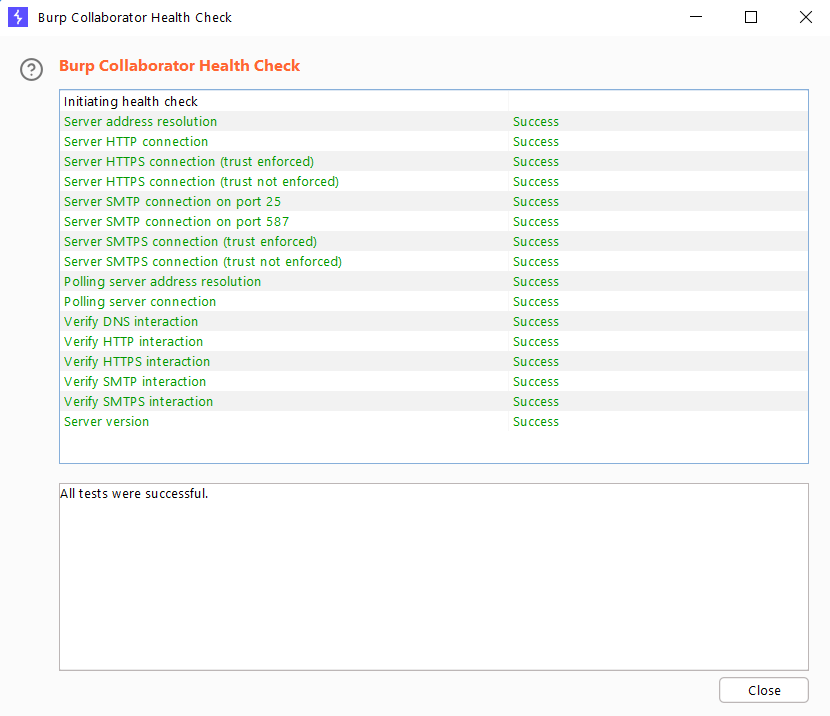
To check this, go to Project Options > Misc and click the Run health check button.
This will return information about the Burp Collaborator’s health status.
#10 Simulate Manual Testing
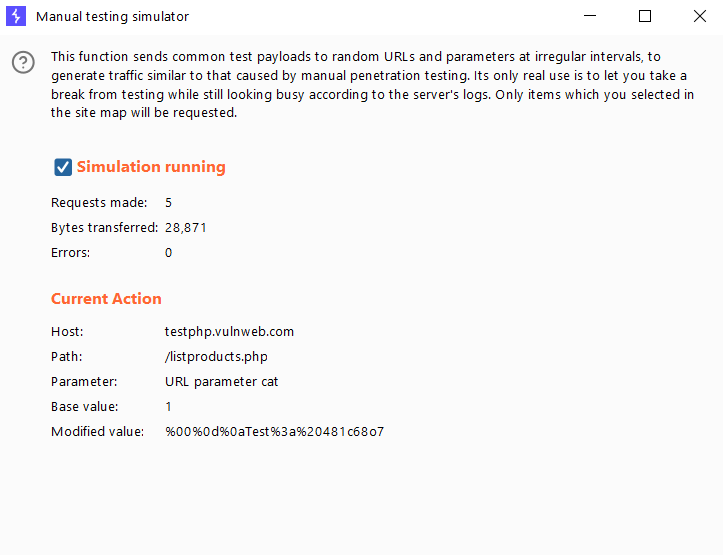
This function will not increase your productivity, but it may be useful from time to time. To simulate manual penetration testing traffic, the function sends common test payloads to random URLs and parameters at irregular intervals.
Its sole purpose is to allow you to take a break from testing while remaining active in the server’s logs. Only the items from the site map that you selected will be requested.
Navigate to the Target tab and select the domain for which you want to perform simulation testing.
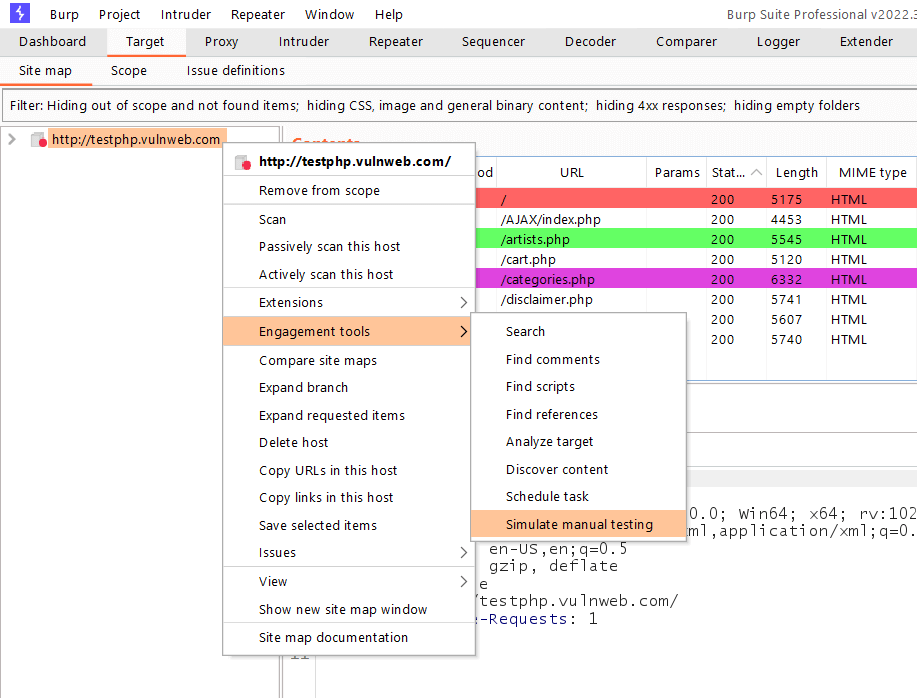
Then, under Engagement Tools, select Simulate Manual Testing.
On the next screen, check the box to begin the manual testing simulation.
Though there are numerous Burp Suite tweaks, I hope I covered some interesting and useful tricks for using Burp Suite efficiently. I will be writing Part 2 of this Burp Suite series soon.
Stay tuned to my blogs to get more exciting writeups and tutorials. Happy Learning and Happy Hacking!!
Get in touch with me –
https://twitter.com/Pethuraj
https://www.linkedin.com/in/pethu/

