How to use Burp Suite Like a PRO? PART – 2
Ready to level up your Burp Suite skills? In part 2, I’ve compiled some awesome tips and tricks to help you test web security faster, smarter, and more efficiently. Learn to save time and find vulnerabilities like a pro!
1. Ctrl+R – Ctrl+Shift+R – Ctrl+Space
One of my favorite shortcuts in Burp Suite is Ctrl+R to send a request to Repeater, followed by Ctrl+Shift+R to quickly navigate to the Repeater tab, and then using Ctrl+Space to issue the request from there.
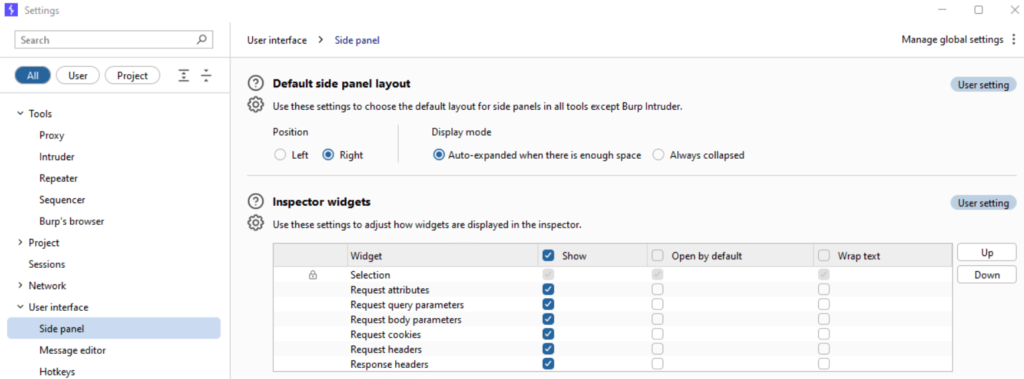
2. Inspector
Burp Suite’s Inspector lets you quickly view and edit HTTP and WebSocket messages from the interception page itself without switching tabs, streamlining your analysis.
You can also customize the widgets from the inspector tab from the settings section.
It’s a dynamic widget that instantly shows encoded or decoded data when you select content from the raw request, streamlining analysis without switching tabs.
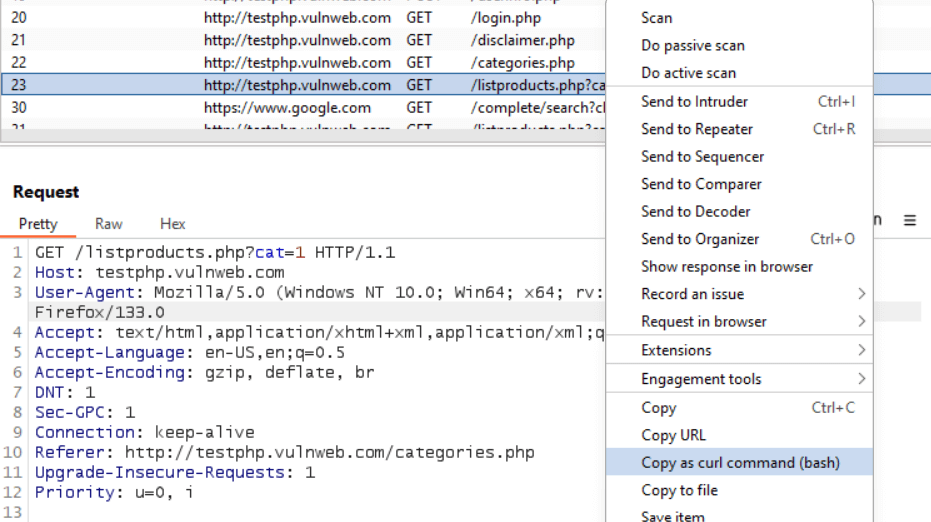
3. Copy as curl
Copy as cURL feature allows you to easily convert a Burp Suite request into a cURL command, enabling anyone, regardless of their familiarity with Burp Suite, to run it from the command line. This simplifies the process for testers and developers to replicate requests and test APIs without needing to navigate the Burp Suite interface.
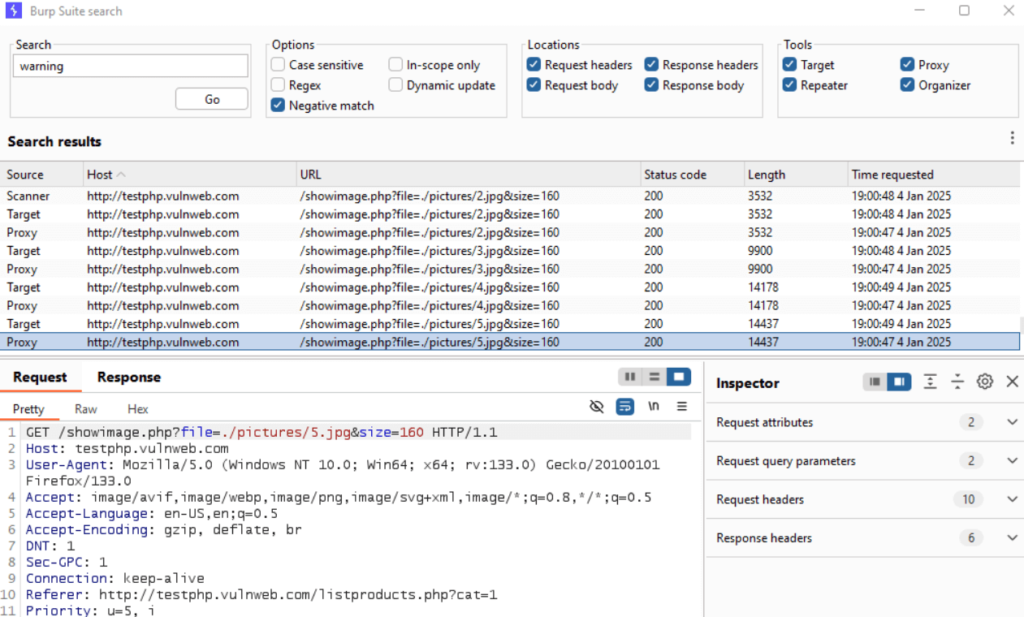
4. Using “Negative” Matches to Filter Irrelevant Data
You can enable “negative” matches to exclude requests or responses that contain specific strings you want to avoid. This helps you focus only on relevant data and ignore unnecessary information.
In this example, I filtered out the word “warning” from the request, which prevents specific words from showing up in our search results.
5. Organize Your Burp Suite Testing with Repeater Tab Groups
Simplify your security testing with Burp Suite’s Repeater tab groups. This feature helps you organize requests into labeled groups, keeping your tests clear and clutter-free.
Whether you’re testing login functionality, search queries, or APIs, tab groups let you focus on specific tasks without losing track of progress. Perfect for streamlining workflows and boosting productivity!
Do you still work with so many open Repeater tabs? It can be confusing and messy.

You can group Repeater tabs by specifying their tab number.
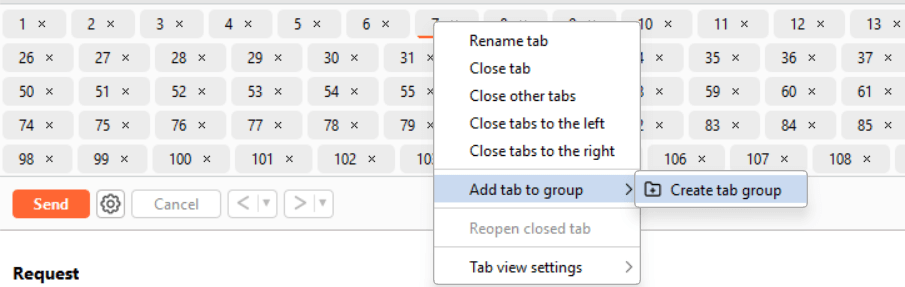
Now, after grouping and adding colors, it looks clean and well-organized.

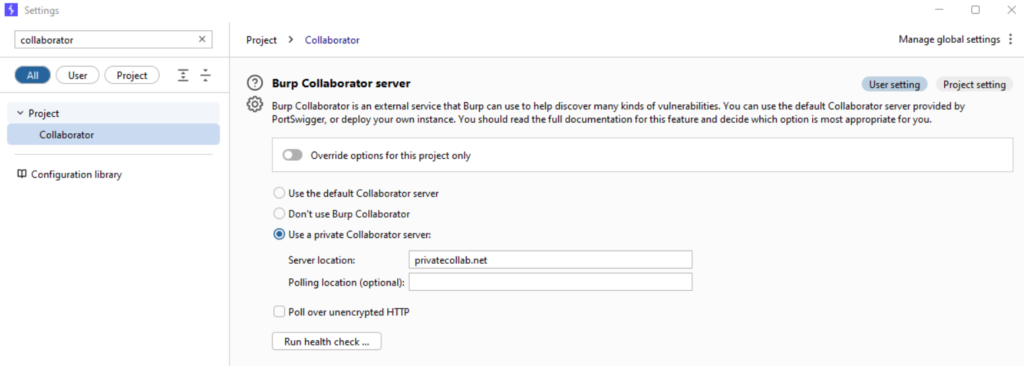
6. Setting Up a Private Collaborator Server
In Settings > Projects > Collaborator, you can configure your own private or custom Collaborator server URL. This allows you to manage out-of-band interactions securely. You can also check the health of your Collaborator server to ensure it’s running smoothly during your tests.
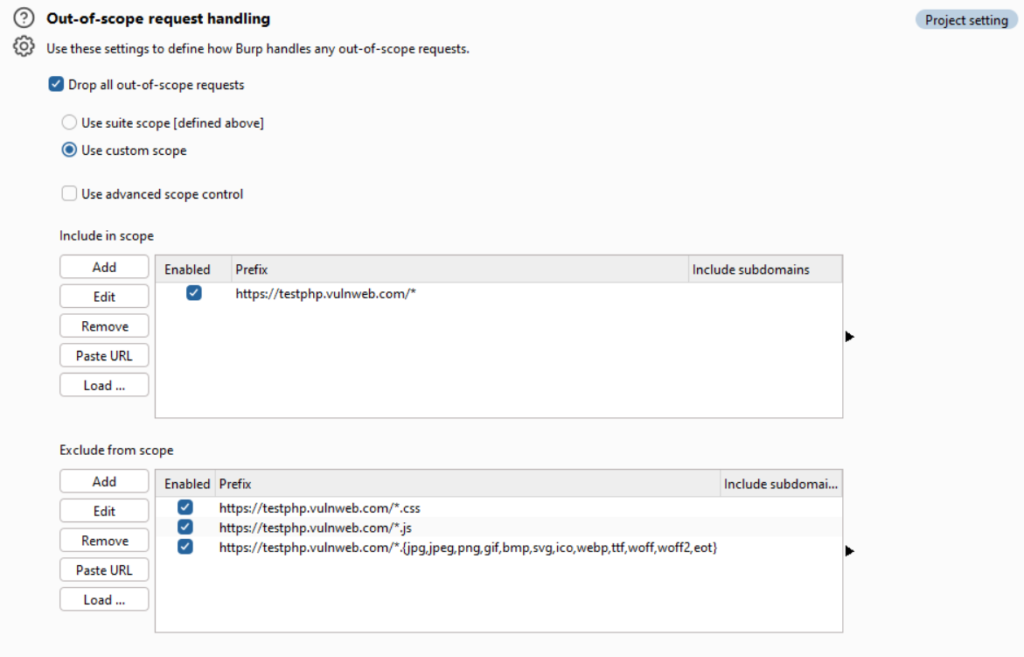
7. Setting In-Scope and Out-of-Scope Requests
In Settings > Project > Scope in Burp Suite, you can define which requests are in-scope for testing. For out-of-scope requests, you can specify how they should be handled, such as ignoring them or triggering a warning. This helps focus your testing on relevant targets and avoid unnecessary noise.
Refer more here from Scope settings – PortSwigger
8. Manually Recording Issues (Vulnerabilities) in Burp Repeater
In Burp Repeater, you can manually record potential issues or vulnerabilities by marking specific requests, allowing you to track and manage findings effectively.

9. Configure Uninteresting Headers
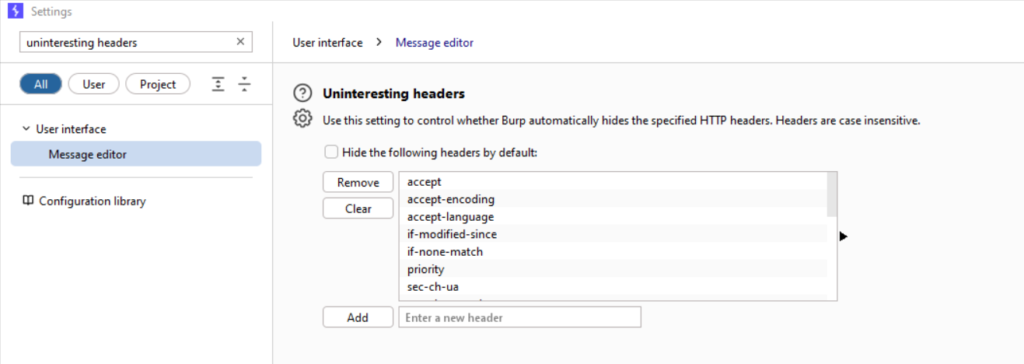
In Settings > User Interface, you can specify which headers are considered uninteresting and configure them to be hidden.
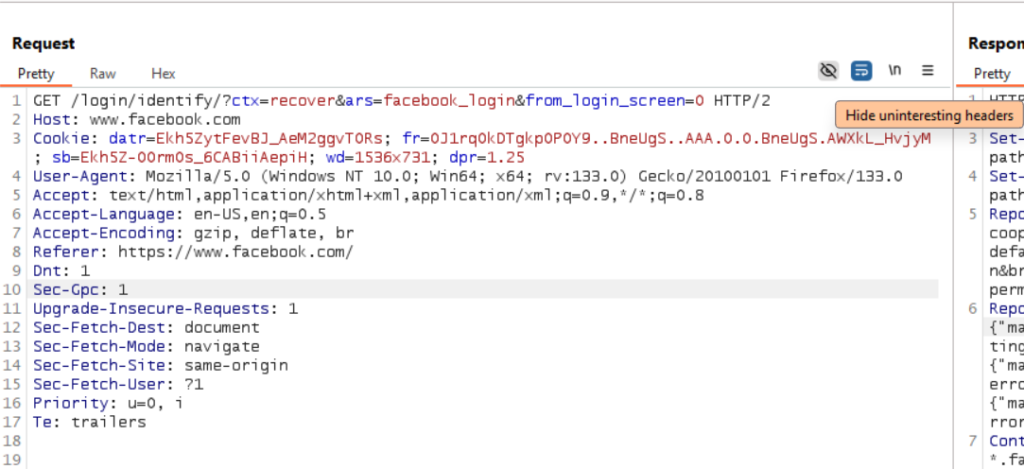
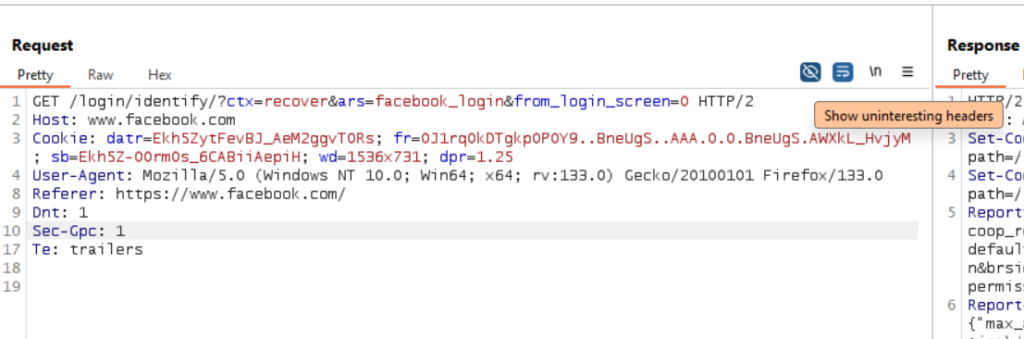
Just like that, you can toggle the visibility of these headers in Repeater using the eye icon, helping you focus on the most relevant data during testing.
You can also choose which headers you find uninteresting and configure them in the settings section.
10. Scanning APIs easily by uploading Definitions
Simplify your API scanning process by uploading predefined API definitions in Burp Suite.
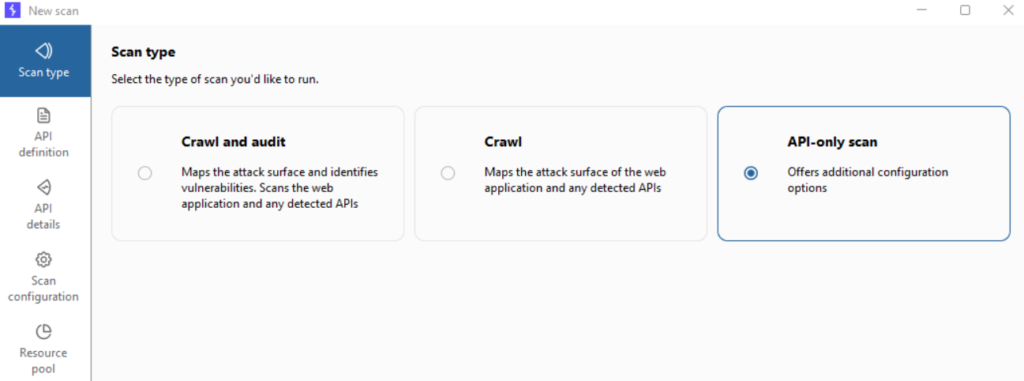
This feature allows for automated scanning based on the structure of your API, saving time and assuring thorough coverage without the need for manual configuration.
The best part is that Burp Suite automatically detects endpoints and parameters.
To try this feature, use this sample https://petstore.swagger.io/v2/swagger.json and import.
Thanks for reading! I hope these Burp Suite tips help you level up your pentest skills. If you found this helpful, feel free to share. Stay tuned for more insights in upcoming blogs!
Get in touch with me –
https://twitter.com/Pethuraj
https://www.linkedin.com/in/pethu/